Using Git & GitHub with Ranorex
In this tutorial, we will be walking through the process of setting up Git/GitHub with Ranorex. This demo will be using Ranorex 8.3 but this will work on most recent versions of Ranorex too.
Step 1 (All Testers) – Set up Git/GitHub
- Install Git – https://git-scm.com/downloads
- Install TortoiseGit for Windows – https://tortoisegit.org/download/
- Register a GitHub account (github.com)
Step 2 (Tester 1) – Integrate Ranorex with Git
- Create a Ranorex project as usual
- Create a simple script and run it, make sure there are no errors
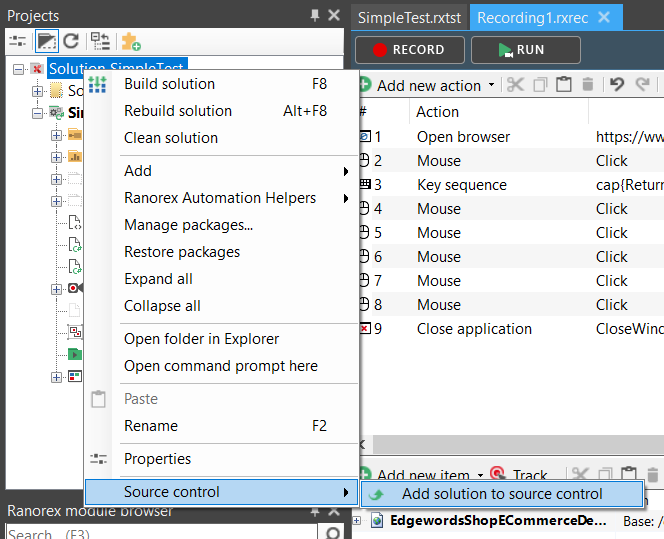
- Add solution to source control
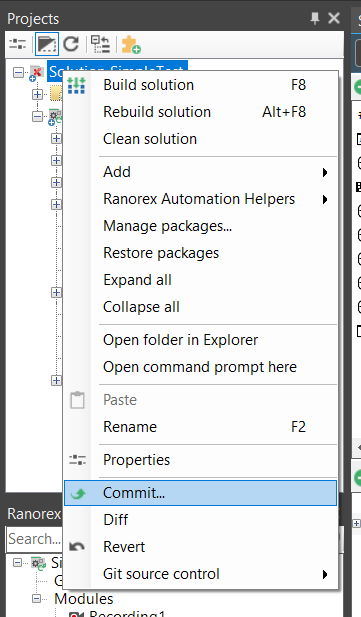
- Perform an initial commit, locally
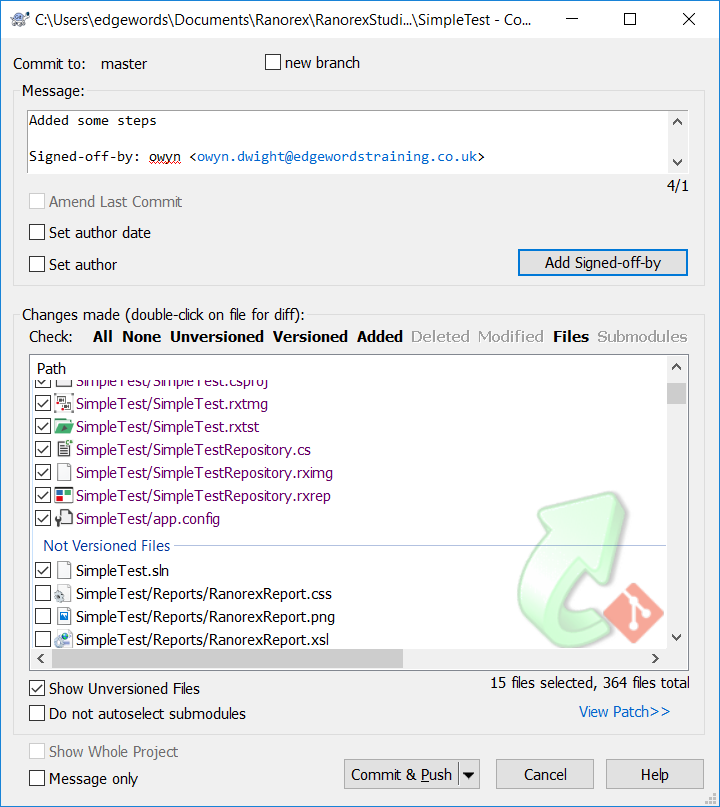
- Enter commit message and choose files you wish to add to source control
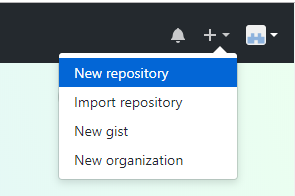
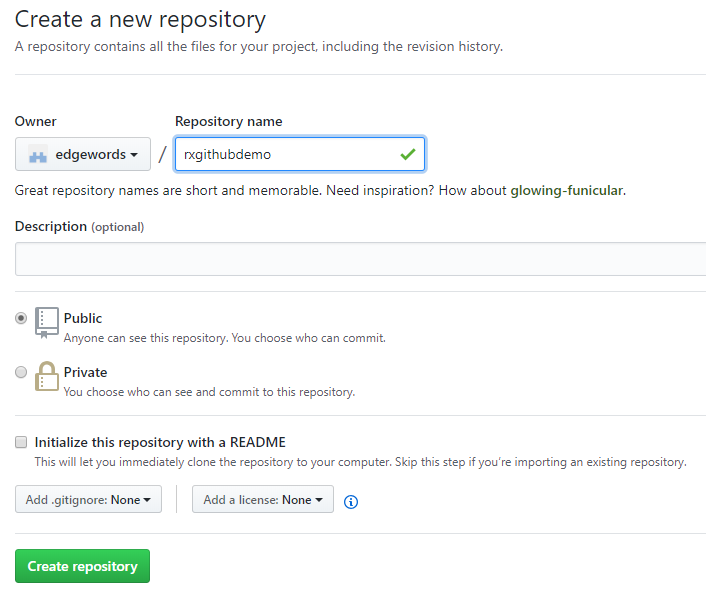
- Create an empty GitHub Project at Github.com (Do not initialize!). This will be the Master Repository that everyone with push & pull changes from.
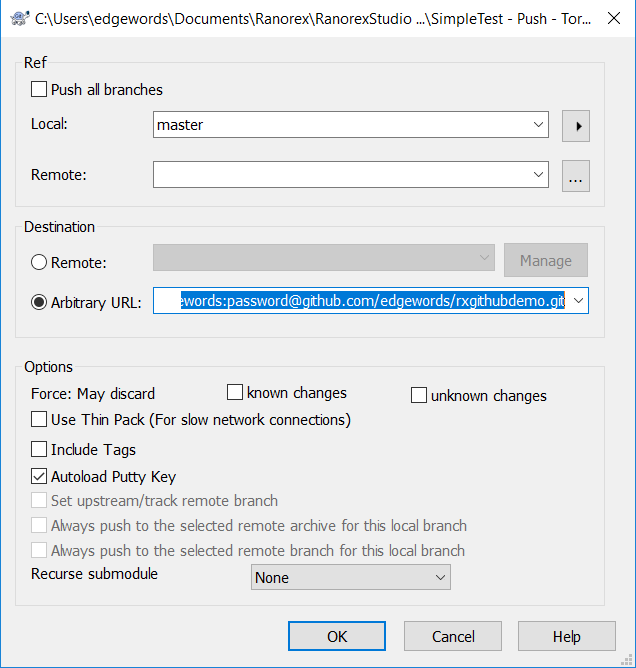
- Push your local Ranorex Project to your new GitHub repository
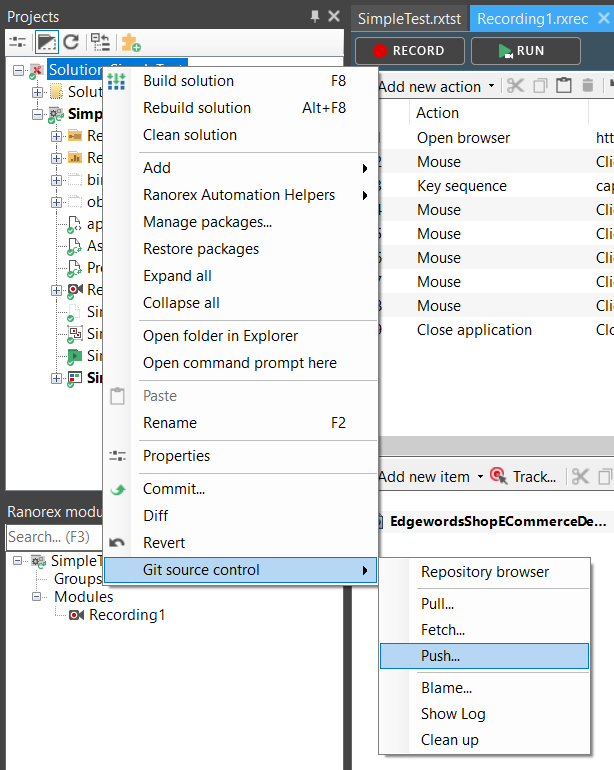
- Enter GitHub URL with username and password, for example: https://username:password@github.com/username/project.git
Step 3 (Tester 2) – Pull from GitHub
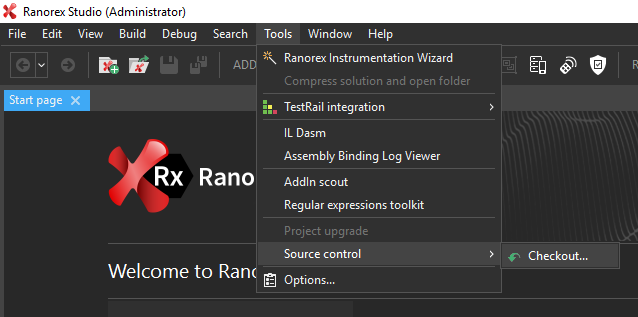
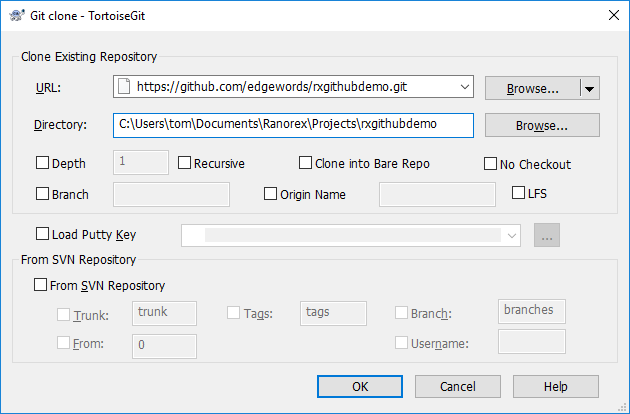
- Open Ranorex, and choose Tools->Source Control->Checkout
- Set the GitHub URL & the local folder (incl. Project folder name) that you wish to pull it down to:
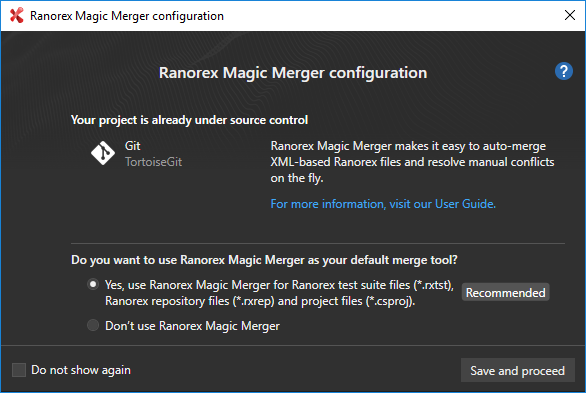
- Project should open automatically in Ranorex, Use the magic merger tool if prompted (makes life easier!)
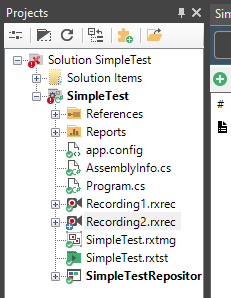
- Project is now open on Tester 2’s local Git Repository, Tester 2 can now add some extra modules/tests etc.
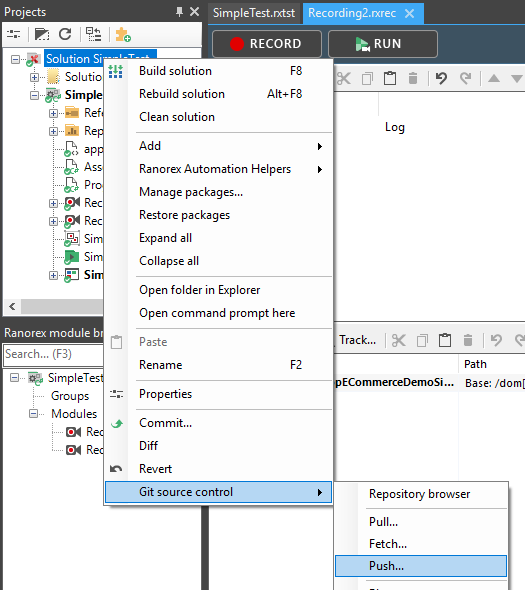
- Tester 2 now does a local commit (local git repo)
- Then pushes to GitHub
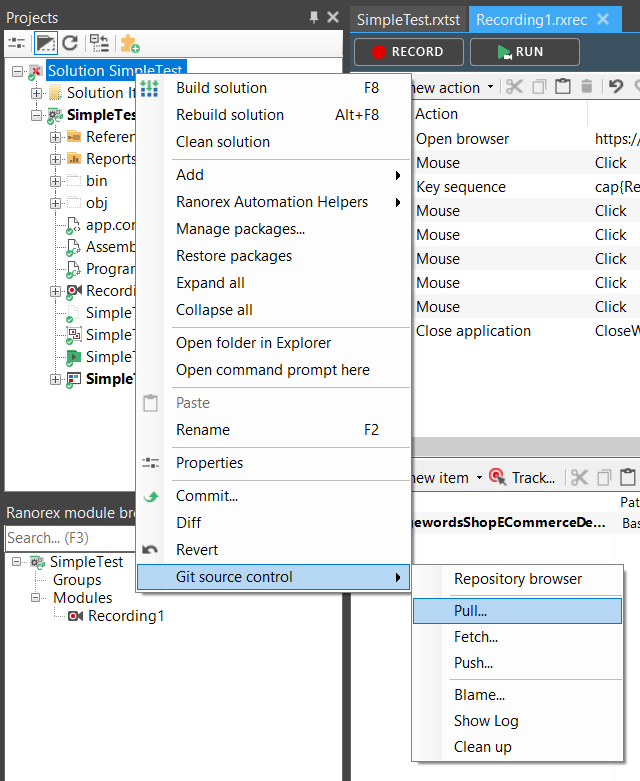
Step 4 (Tester 1) – Pull from GitHub
- Testers can now Pull any changes down from GitHub:
Now we are using GitHub as our master repository, when testers open Ranorex they open their project locally, then Pull any changes down from GitHub, add to the project, commit the changes locally and then Push the changes up to GitHub for others to Pull.
Ranorex Training
For training in Ranorex, please see our Ranorex Courses page