When using Selenium WebDriver, you may be aware that you’re scripts must always know about the driver server (chromedriver, geckodriver etc.). This can be done in various different ways; setting the path in each script or adding the folder to the system path. We now have another, easier method; WebDriver Manager.
WebDriver Manager will handle the setup of the driver server, so all we have to do is add a dependency, a couple of lines of code and we are done for the entire project.
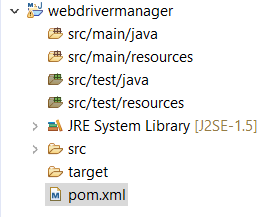
Step 1 – Adding the dependency to the pom.xml
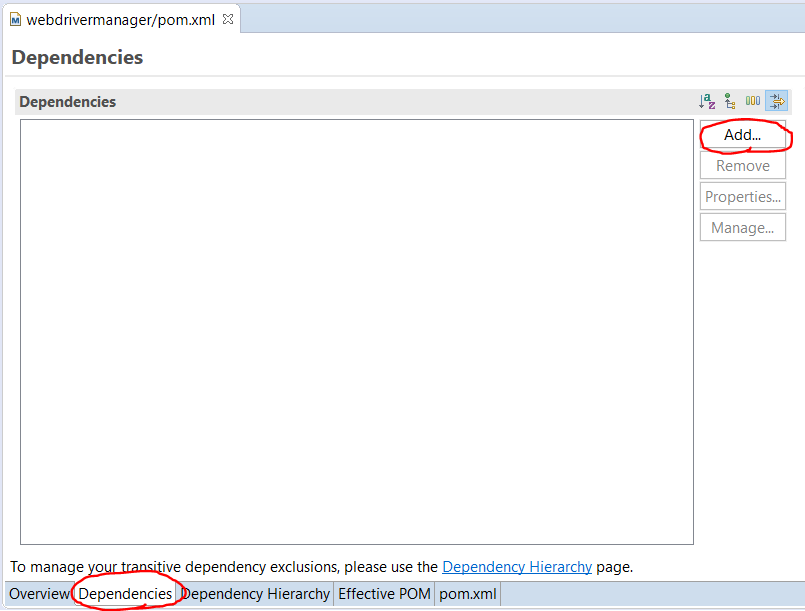
- Open up the pom.xml file in your project
- Click the dependencies tab at the bottom of the pom file
- Select add
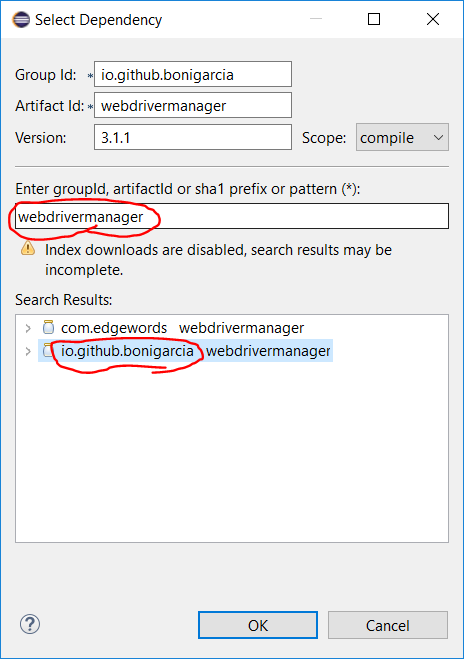
- Search for webdrivermanager
- Select the ‘io.github.bonigarcia webdrivermanager’
- Click OK
Step 2 – Add code to access WebDriverManager class
- Now head into your setup region/anywhere before you instantiate the browser
- Call the WebDriverManager class
- Use ‘.’ to open up the various methods belonging to the class
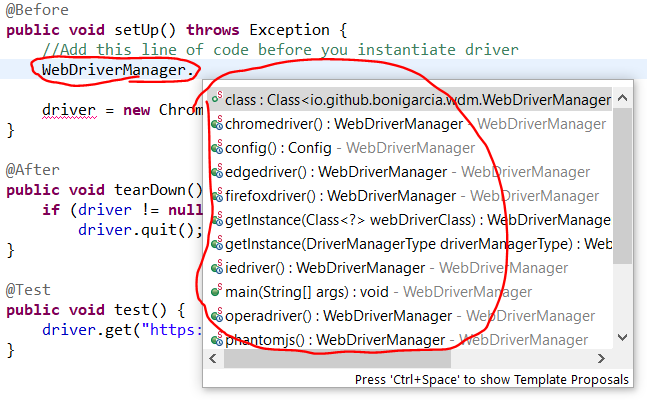
- For our example we are going to use Chrome
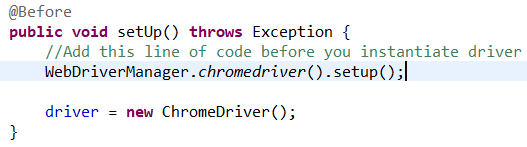
- This one line of code should handle everything, so we don’t have to tell the script about our driver server, or even download the file
package webdrivermanager;

import org.junit.After;
import org.junit.Before;
import org.junit.Test;
import org.openqa.selenium.WebDriver;
import org.openqa.selenium.chrome.ChromeDriver;

import io.github.bonigarcia.wdm.WebDriverManager;

public class WDManagerDemo {
	WebDriver driver;

	@Before
	public void setUp() throws Exception {
		//Add this line of code before you instantiate driver
		WebDriverManager.chromedriver().setup();

		driver = new ChromeDriver();
	}

	@After
	public void tearDown() throws Exception {
		if (driver != null)
			driver.quit();
	}

	@Test
	public void test() {
		driver.get("https://www.edgewordstraining.co.uk/");
	}
}
For more information on the webdriver manager, please see: https://github.com/bonigarcia/webdrivermanager
For more information regarding Selenium WebDriver, head over to https://www.edgewordstraining.co.uk/automated-software-testing-training-courses/selenium-training/