How to use Maintenance Mode in Ranorex 8.0
Maintenance Mode is a handy new feature, added to Ranorex Studio in version 8.0. It allows for the ability to pause, catch and debug certain errors and then continue to run your tests, during test execution, therefore saving time and making the test script writing process, a whole lot more efficient.
One of, if not the, largest cost within test automation, is maintenance, so any improvements to maintainability, efficiency and speed, are going to be beneficial. Having the ability to pause, fix an error and then continue the test run, means we no longer have to wait for our test run to finish executing, before we can dive in and diagnose errors. We can do this during the test run, which I believe, also assists us in identifying problems, as you can see in real-time, exactly where your test has gone wrong.
Step 1 – Create a simple script/Use an existing test suite:
To begin, I am going to create a simple script, within Ranorex, that falls over, so I can demonstrate, exactly how maintenance mode works.

So here we have a simple script, that:
- Launches our AUT (KeePass in this instance)
- Logs in
- Adds an entry; ‘Owyn’
- Deletes the entry
- Closes AUT
However, we have made a slight change. If we take a look at the Object Repository, we have modified the object identification, so that it will now be looking for a cell, with the text of; ‘ranorex’ instead.
This is hopefully going to cause our test to fail.
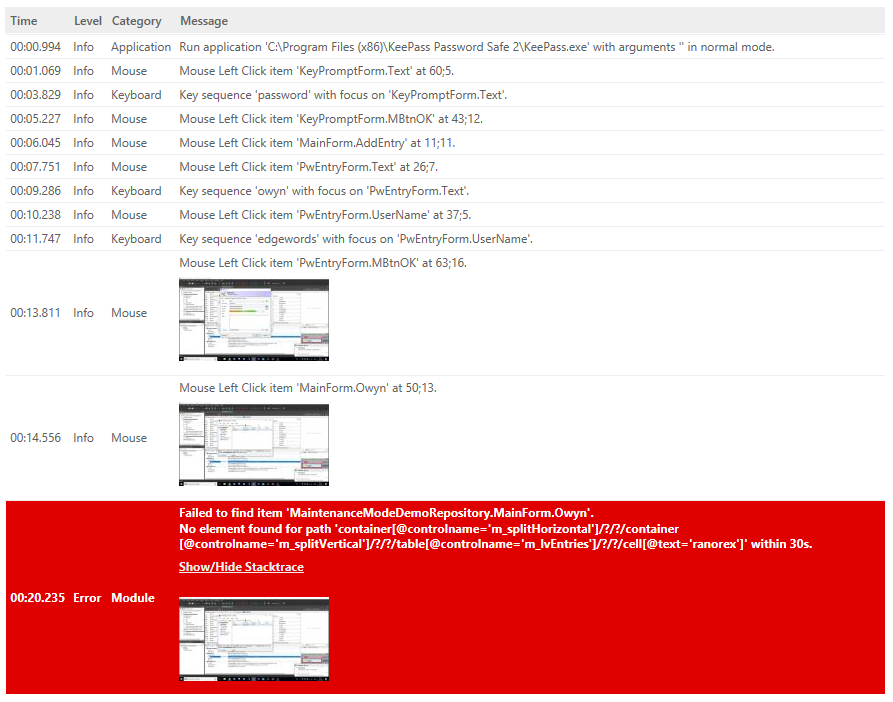
As you can see, our test is now failing because of an object identification issue; ‘No element found for path …’
Lets run this using Maintenance Mode.
Step 2 – Enable Maintenance Mode:
To enable Maintenance Mode;
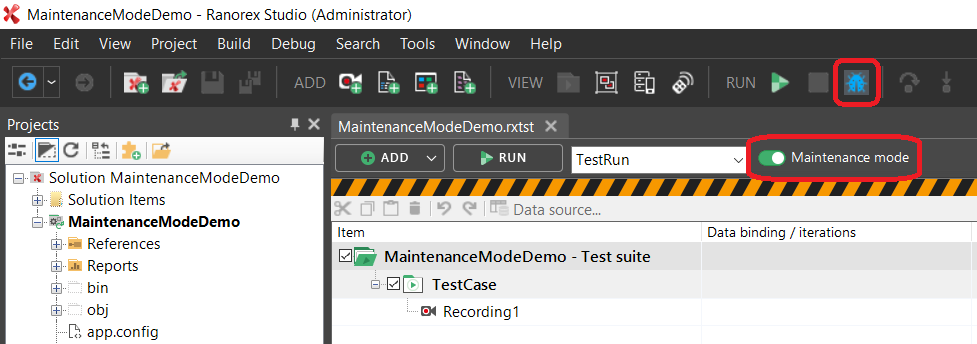
- Enable debugging using the icon highlighted below
- Head over to the Test Suite view
- Toggle Maintenance Mode on
Once you have enabled, both debugging and Maintenance Mode, you can run your test.
NOTE: If using Maintenance Mode, you MUST run from the Test Suite view.
Step 3 – Run your test:
- Now we can execute our test.
Upon finding an error, Ranorex should pause execution and launch the Maintenance Mode dialog.

Maintenance Mode dialog will show us the error and offer us to; Edit and retry the test, Abort the test run, Retry using the same object identification, or simply Continue with the error and move onto the next step in the test. We want to solve the problem and retry.
- Click ‘Edit and retry’.
This will launch the Ranorex Spy and show us in real-time, where our test has gone wrong.
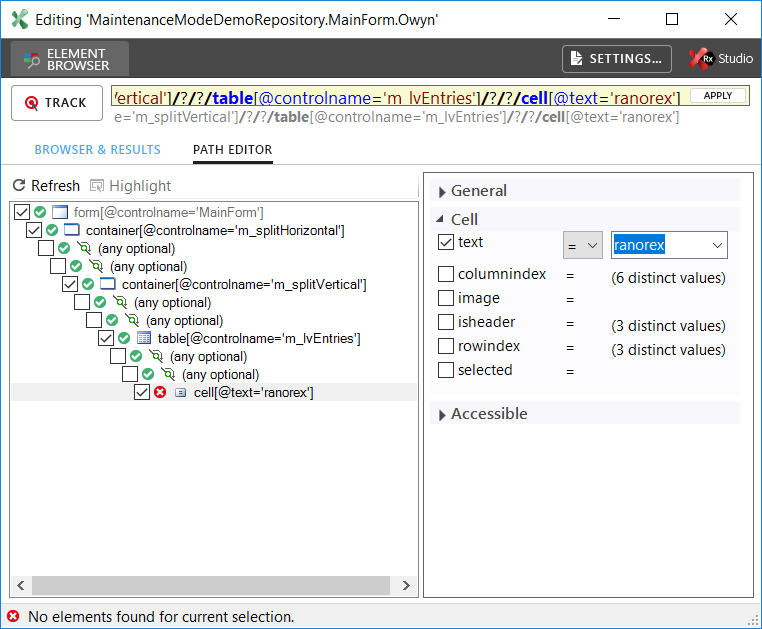
Your AUT should still be open as the test is, essentially, still running. Now we can see that Ranorex is looking for ‘owyn’ but it is finding ‘ranorex’. So we can directly modify the RanorexPath to attempt to solve this issue.
- Update the RanorexPath to allow for new object
- Select the drop down and the currently available values, should be present:
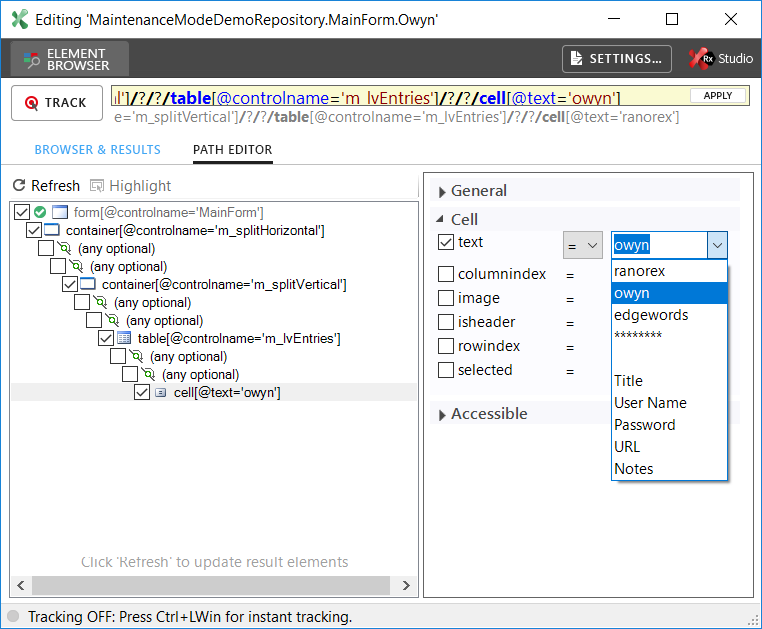
From the drop down list we can see, we have a few pre-defined options to choose from, these options are what Ranorex can currently see within our AUT, as I know Ranorex is searching for ‘owyn’, I can simply select this from the drop down.
- Apply changes
As soon as we hit ‘Apply’, the changes will be applied and the test will attempt to execute the failing step again, if it succeeds, it will continue with the rest of the test. If it fails, it will simply relaunch the Maintenance Mode dialog.
Step 4 – View Results:
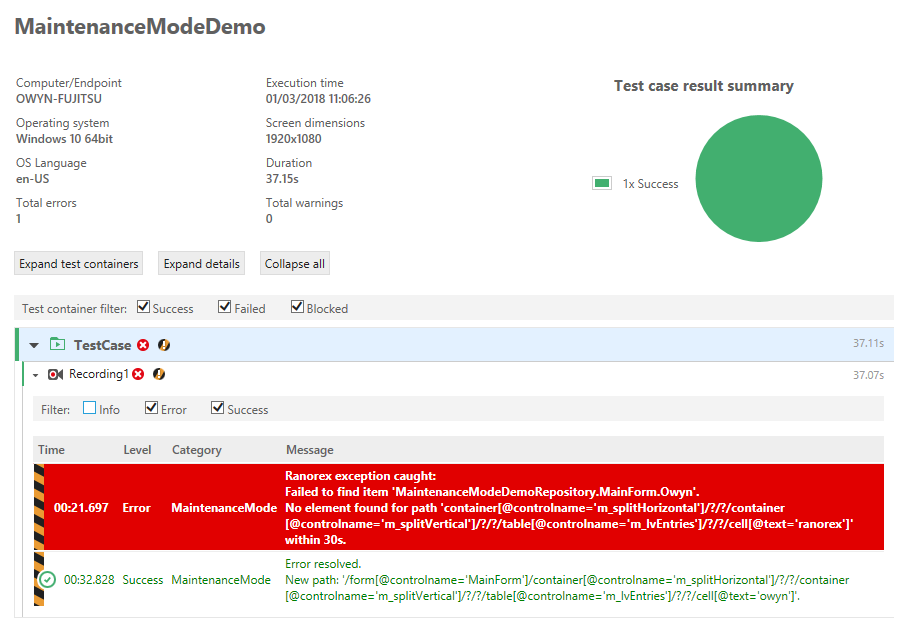
In your results now, you should be notified that Maintenance Mode was activated. Ranorex also tells us, where our test fell over, and how the issue was solved.
For more information regarding Ranorex, please see our: