How to integrate Selenium WebDriver Java, GitHub, Jenkins and Maven
In this tutorial, we are going to be walking through the process of setting up Selenium WebDriver Java with source control and continuous integration. To do this, firstly we are going to need a few things.
Prerequisites:
- Eclipse downloaded and installed (Maven comes with Eclipse)
- Jenkins installed with default plugins
- GitHub account setup
Step 1 – Create a simple WebDriver script
To integrate these tools, we are first going to need a simple WebDriver script, as something for our Jenkins server to run.
- Launch Eclipse
- File->New->Other..
- Search for ‘maven’ in the dialog and select a Maven Project -> Next
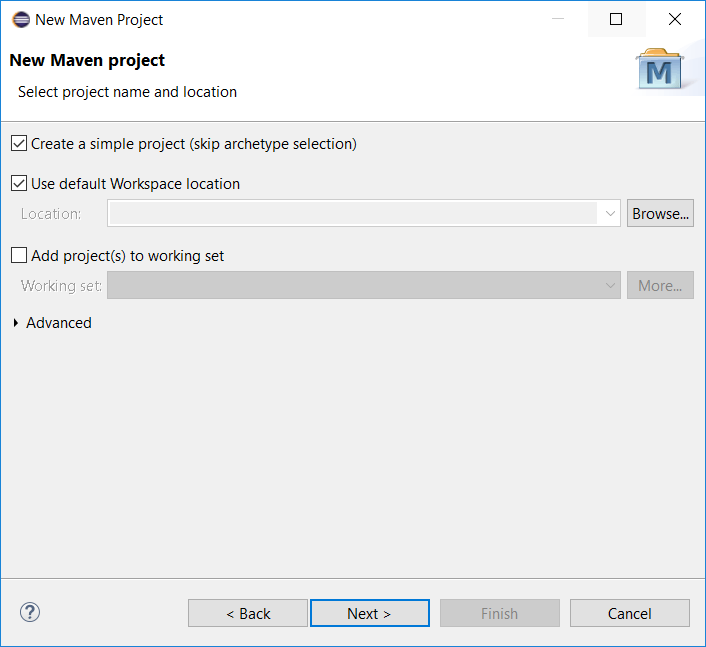
- In the next window, select ‘Create a simple project’ and ‘Use default workspace’, unless you want to specify a different location for your project to be stored
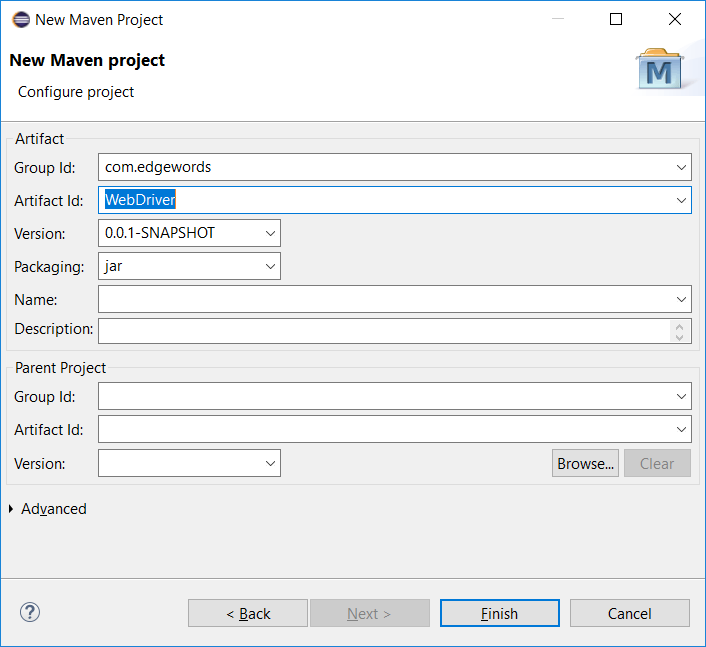
- Now you will need to enter your group id (company name, e.g. com.edgewords) and your artifact id (project name, e.g. WebDriver)
- Click Finish
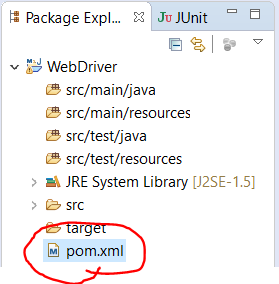
- Once you have launched your project, you will need to set up the pom.xml file to get all of the dependencies
- Open your project in the workspace -> open ‘pom.xml’
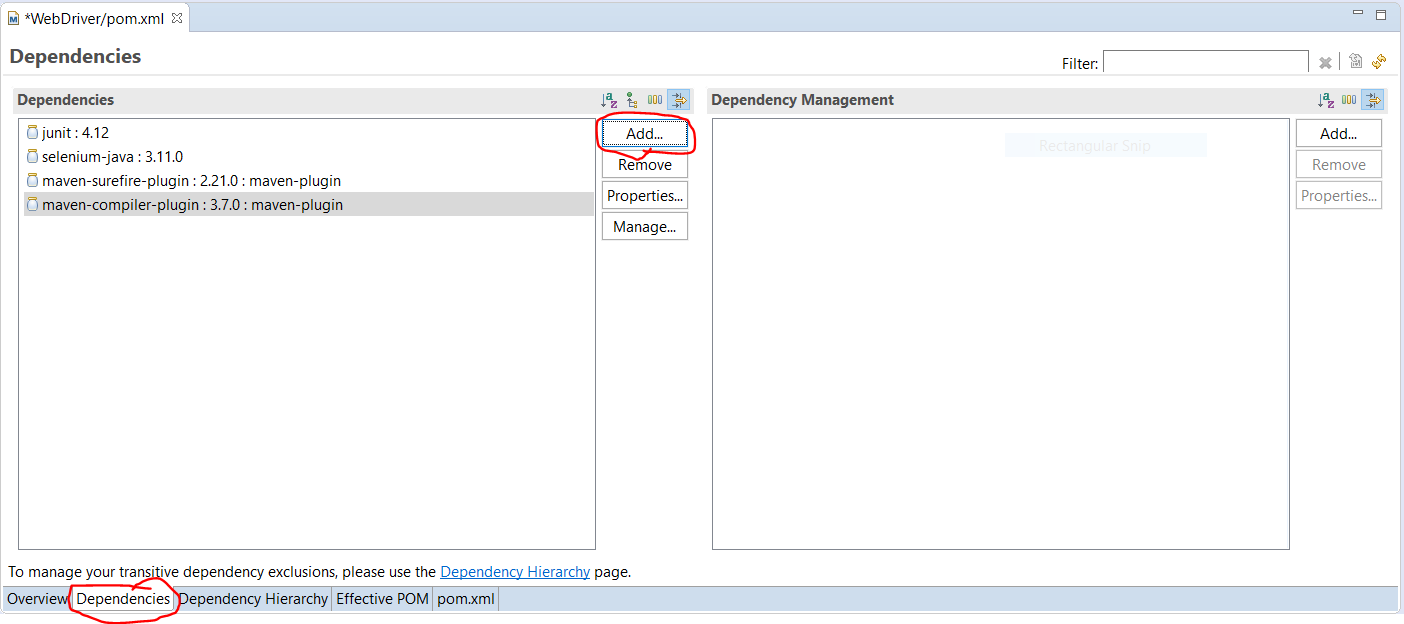
- At the bottom of the pom.xml file in eclipse, you should see tabs-> Select ‘Dependencies’
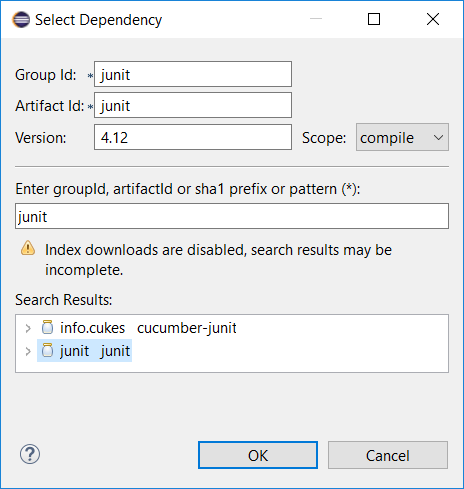
- Click ‘Add’ and search for:
- junit
- selenium-java
- maven surefire plugin
- maven compiler plugin
- Once you have searched and added all of these dependencies, your Dependencies page should look similar to this:
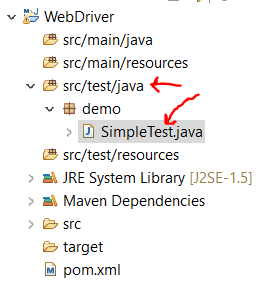
- In your project workspace, you should see a package, named; ‘src/test/java’, in here create a package and in there create your simple test, I will name mine; SimpleTest and perform a couple of steps
NOTE: Appending your file name with the word ‘Test’ will allow maven to execute this automatically without having to do too much configuration (it executes the Tests within the src/test/java folder)
- Now you can right click your project->Run As->Maven test, to ensure it is picking up the dependencies and plugins as well as your tests
- If it doesn’t run properly, you may need to repeat some of the previous steps
- We will now be adding this project to GitHub so make sure you have a GitHub account setup for the next stage
Step 2 – Integrate with GitHub
- Head over to GitHub.com
- Create your project/repository
- Head back into eclipse
- From the toolbar, select Window->Show View->Other…
- Open Git repositories (if you cant see it, search for it in the dialog, it should be in there somewhere)
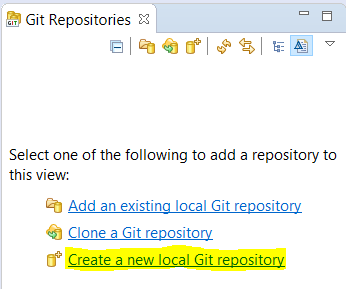
- In the new Git Repositories window that appears, simply click ‘Create a new local Git repository’
- Now specify the repository directory as your project workspace
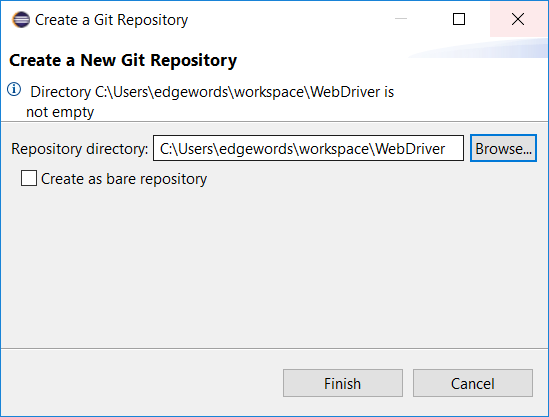
- Hit Finish
- Right click on your project in the git repositories window and select ‘Commit’
- This should open up the Git Staging window, in here you will see a couple of sections; Unstaged changes, staged changes and Commit message
- You must move all files you wish to commit (in this case all of them) to the Staged changes window by simply selecting them all and dragging and dropping them in
- Add a commit message, for the first commit I entered; First version
- Now if you only want to commit locally, just click Commit, however, if you want to push those changes up to the GitHub repository we created earlier, we select; Commit and Push
- Click Commit and Push
- In the dialog that appears, enter your repository URL into the URI field (it should auto-complete the remaining fields)
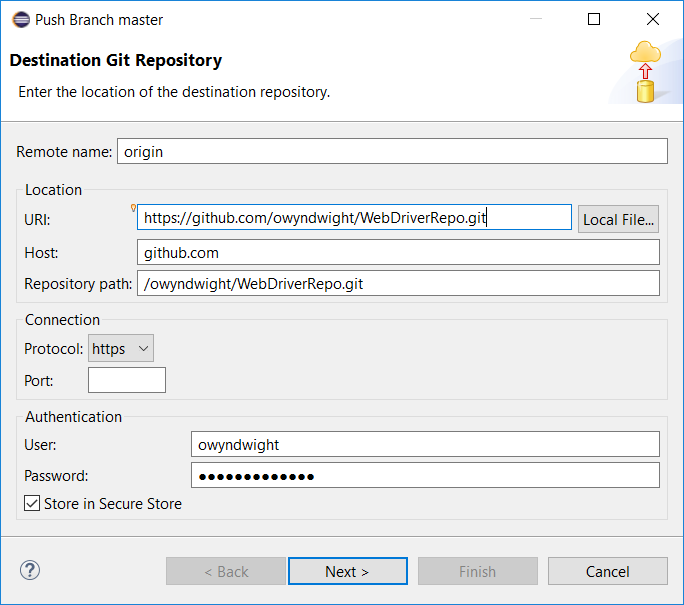
- Next->Next->Finish
- Give it a few seconds to connect to the repository and push the files, another dialog should appear just to confirm the push, simply click Close
- Check on GitHub to see if your files have been pushed correctly by refreshing your repository page
- You can now close Eclipse
Step 3 – Jenkins Configuration & Node Setup
- Now you will want to head over to your Jenkins server
- Manage Jenkins (if you do not have the default plugins installed you will have to grab the; Git, GitHub, and the Ant plugin from the Manage Plugins section)
- Click ‘Global Tool Configuration’
- Add JDK, give it a name and pass in the path to the JDK folder

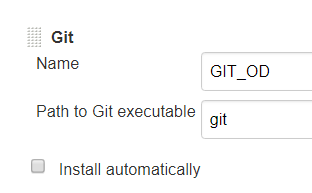
- Add GIT, here in the path we simply entered ‘git’
- And finally add the installation for Ant

- Don’t worry about it saying that Ant is not a directory, remember the Jenkins server will be running on another machine which probably won’t have all of these things installed on, as long as it is on the machine on which your tests will be running, you should be ok
- Save the configuration
- Back in the Manage Jenkins section, go to Manage Nodes
- Create a New Node, give it a name and make it a Permanent Agent
- In the Node settings, enter a root directory path to a folder (we simply created an empty folder on our C drive named; Jenkins Workspace)
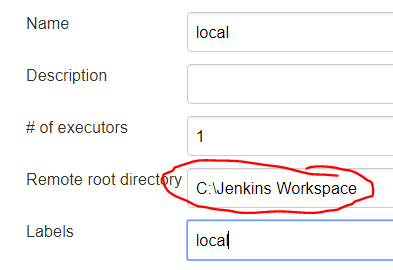
- And give it a label, this can be the same as the name
- Click Save
- Click the new node from the list and click the orange Launch button
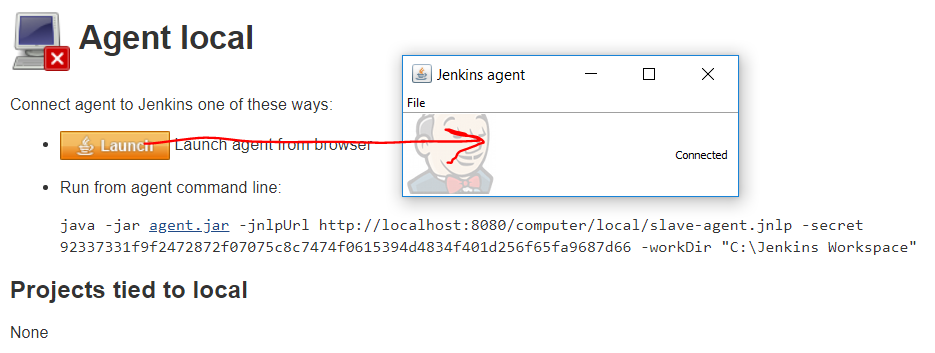
- This should launch the Jenkins agent on the specified machine, after the file has downloaded
Step 4 – Jenkins Job
- Head back to the homepage of Jenkins and create a new job
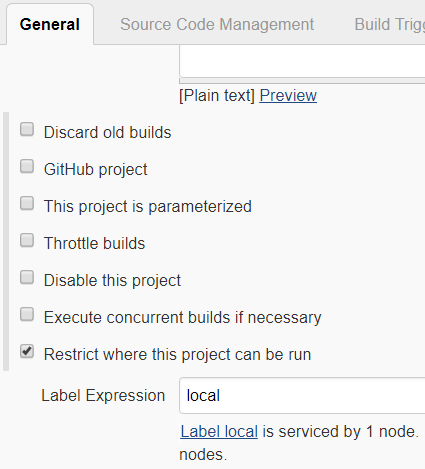
- General:
- Under the General section you should see an option to ‘restrict where this project can be run’
- Tick this and pass in the label of your node
- Source Code Management:
- Git
- Pass in the path to your GitHub repository in the Repository URL field
- Build:
- Add ‘test’ as the Goals
- Add ‘pom.xml’ as the POM
- Now save the job and perform ‘Build Now’ to execute your job and see if it picks up on the test correctly
- If it does, good job! You can now fully integrate this, get Jenkins to check the GitHub repository for changes every hour or so and also get Jenkins to publish the JUnit results
Extra – Polling and JUnit Test Results
Polling:
- If it runs successfully, you can set up polling of your GitHub repository, so that if a change is pushed to the repo, Jenkins will see that change and re-build and re-run your test
- Simply go back to the job configuration page
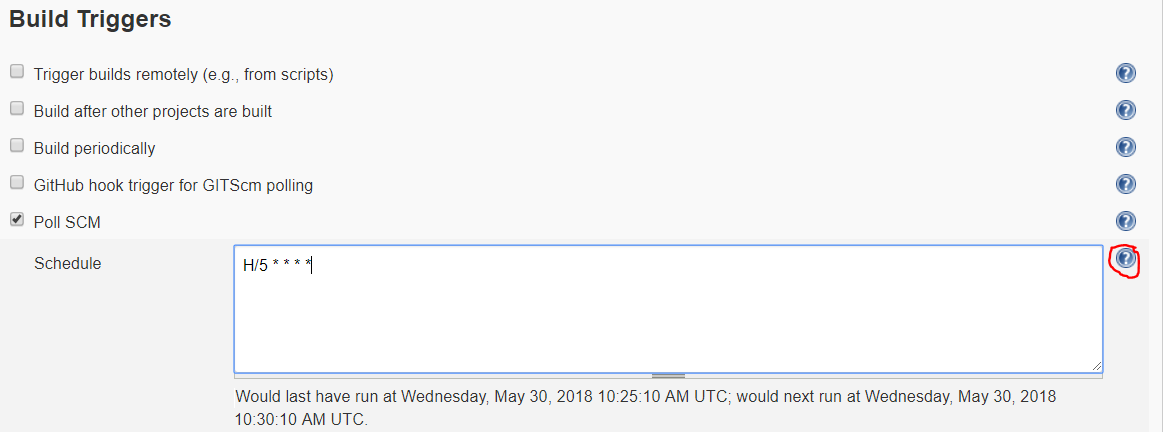
- Under the Build Triggers section, you should see a ‘Poll SCM’ checkbox. Tick this
- You can find more information on the format of the schedule by clicking the question mark icon highlighted below, we simply set this up to poll every 5 minutes for any changes
- Now when I save this, Jenkins will be checking for any changes within my GitHub repository
Publish JUnit Results:
- To publish the JUnit results to Jenkins we head back into the job configuration
- Down to the ‘Post build actions’ section, add a step for ‘Publish junit test results report’
- Now in here you will need to pass in the name of the test results file from your jenkins workspace (the root directory you set up in your node), the name should be the same, unless you have specified otherwise
- This will be inside a number of folders aswell so the path must represent that:
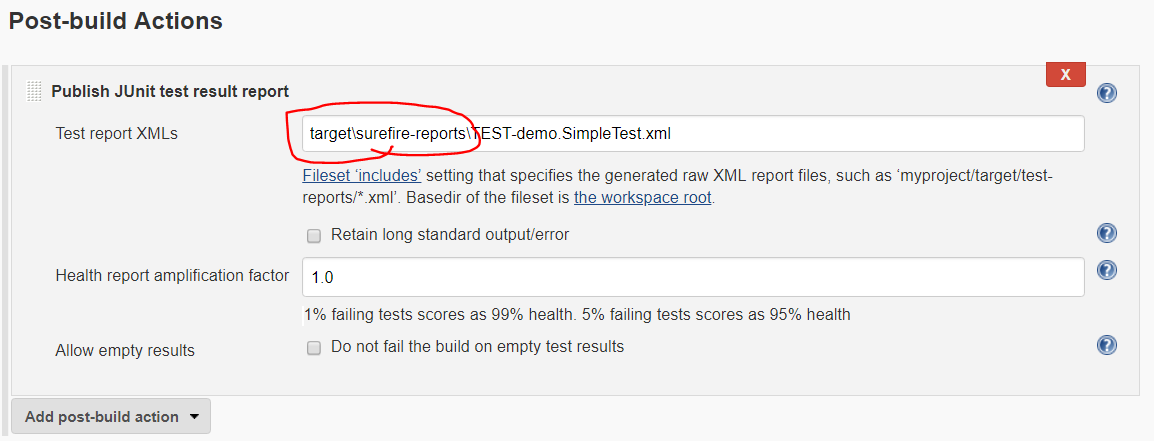
- The ‘target’ folder shown above is within my WebDriver project folder
- Finally if you want to test it and make sure it all works correctly, simply go over to eclipse, make some changes within your test and save, commit and push them up to your GitHub repo
- After 5 minutes (depending on your schedule) you should see Jenkins:
- Execute your test, completely automatically
- And now when you navigate into the Successful build within Jenkins, you should have a ‘Test Result’ section
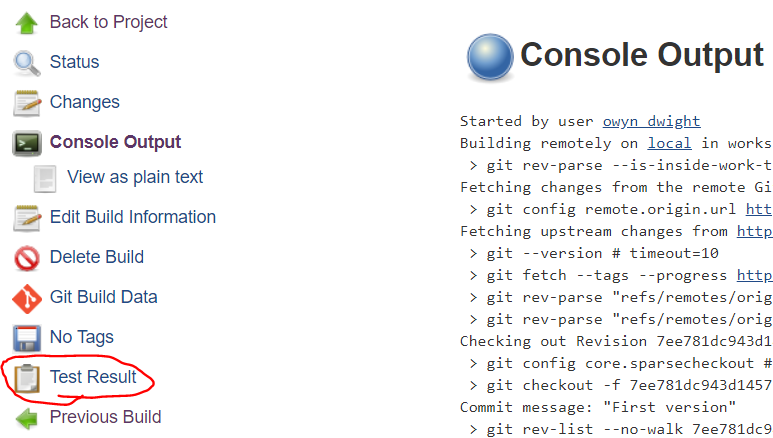
- Open this to get your Junit Results