Appium Desktop 1.1.0 beta4 introduces a Step Recorder. This allows you to record user actions and produces code for you. This can then be copied into Eclipse to give you a boiler-plate script to expand from.
This is very useful for learning Appium or for creating templates to get up and running quickly.
Step 1 – Connect to the device/simulator from Appium Desktop
To use the recorder we need to launch a session in Appium Desktop to invoke the Inspector.
Launch Appium Desktop, click the New Session button and complete your desired capabilities for the device/sim, click the Start Session button (bottom right)

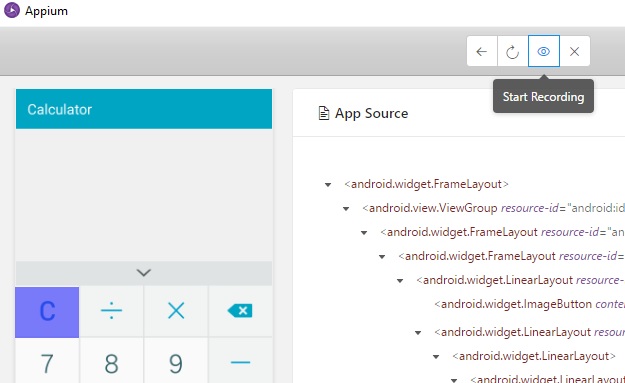
Step 2 – Start Record Mode
Now the Inspector has started and we have our screenshot of the app we are testing, click the record button:
Step 3 – Record some steps
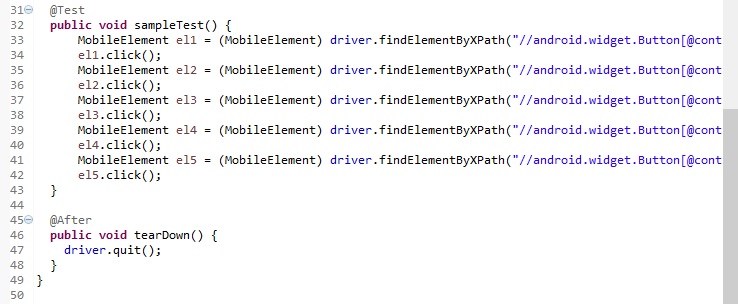
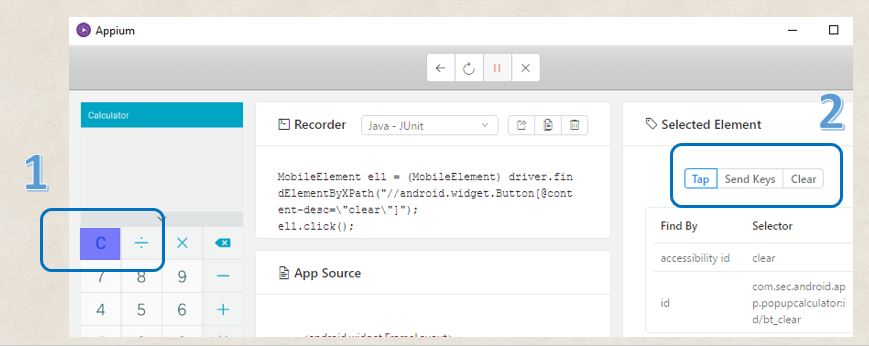
Perform Actions against the screenshot in the Inspector (not the app itself), by selecting a UI Elelement, then clicking the Tap/Send Keys/Clear buttons (number 2 in below screenshot). Code is created for the action e.g:
MobileElement el1 = (MobileElement) driver.findElementByXPath("//android.widget.Button[@content-desc=\"clear\"]");
We can then continue recording our other steps through the Inspector
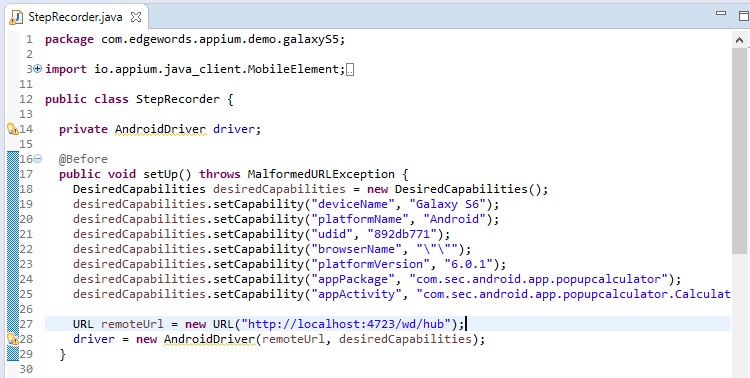
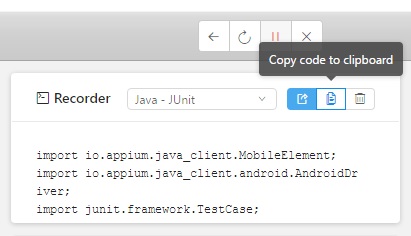
Step 4 – Copy the code to the clipboard
Once you have finished capturing your actions you can then copy the code (see screenshot below). The button to the left of the Copy to Clipboard allows you to also include boiler-plate code. This includes the imports, JUnit test annotations and the Desired Capabilities (very useful!)
Step 5 – Paste into Eclipse
open Eclipse and create a new JUnit Test Class. You can then paste your code over the top and fix the errors (Class name, add external .jar files for imports etc.)