Linux Virtual Machine for Selenium Grid Part 2, link to part 1
Step 6 – Software installation and updates
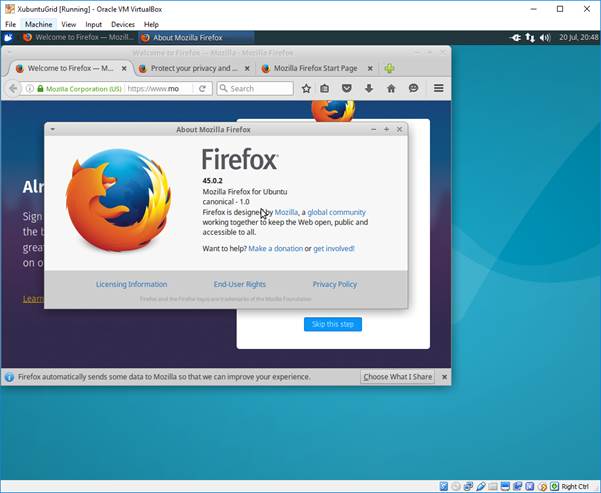
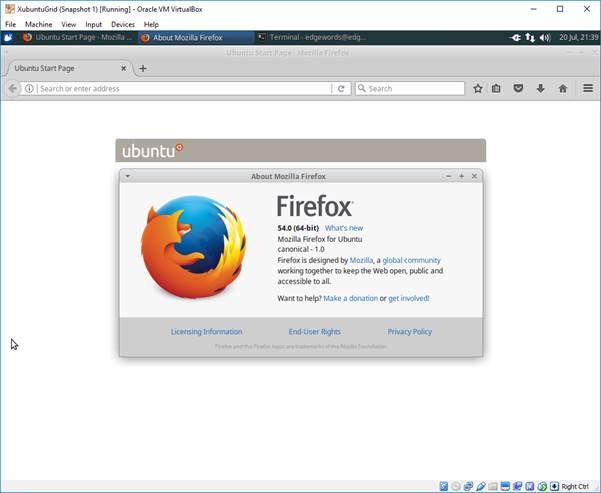
Xubuntus default Web Browser is Mozilla Firefox, and can be launched from the Application Launcher by clicking “Web Browser”. Checking the currently installed version from Help>About Firefox we see it’s the somewhat out-of-date version 45. There’s no need to download the latest version from http://www.mozilla.org/ — we’ll will fix that shortly.
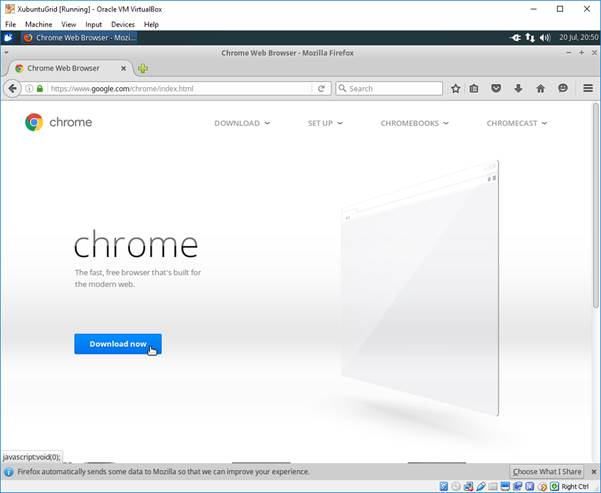
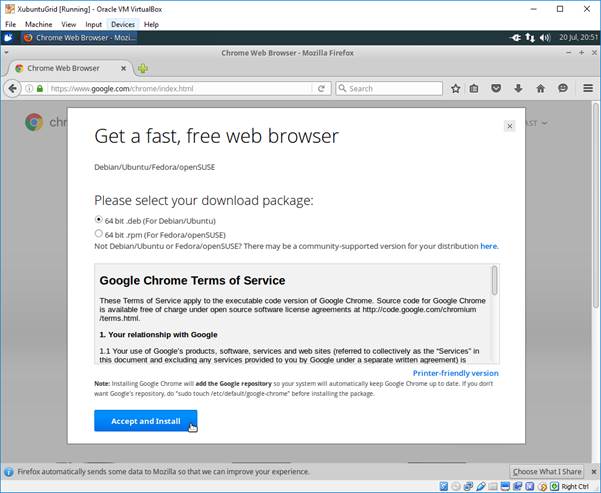
- Using Firefox, go to https://www.google.com/chrome/ and download the “.deb” package
If you’ve installed the 32 bit edition of Xubuntu by mistake (or your host machine is running a 32bit OS, preventing you installing a 64bit version of Xubuntu) you will find there is no appropriate installation package for 32bit Linux – don’t worry. We can use Google Chrome’s open source alternative Chromium, which we’ll also install shortly.
Linux distributions typically install and update software from a central “repository”. Indeed this is why they are typically called “distributions” – it’s a large collection of software. It is a little out of the ordinary (at least for now) to download an installer for a particular piece of software from a website (as we’ve just done for Google Chrome), it’s more typical to install the version of the software that is available in your distributions repositories. This has the advantage that when that software is updated in your distributions repositories that update is available for your system as part of a system update (contrast this with multiple independent application update processes typically found on Windows systems). This is analogous to the new Windows Store application of Mac App Store.
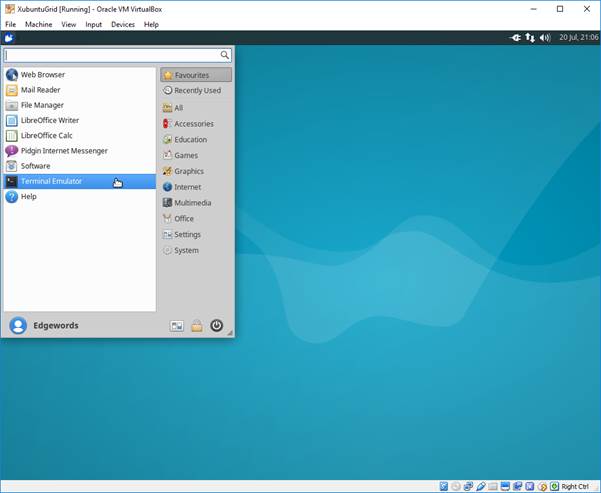
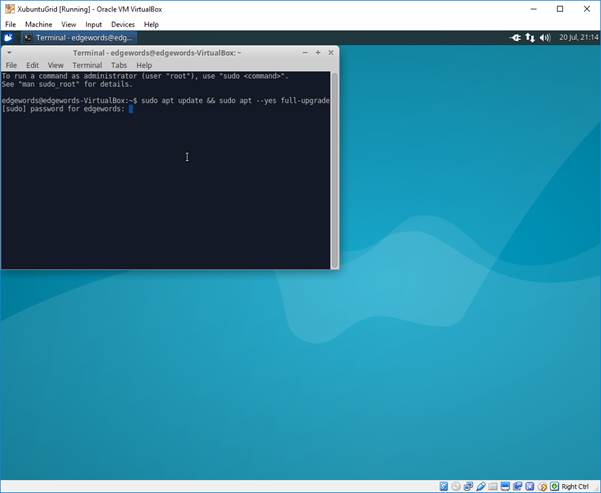
- Launch the Terminal Emulator application. This is equivalent to the Windows cmd.exe command prompt or Power Shell. In a Linux environment all commands are case sensitive, so type carefully!
- Xubuntu will update itself and the software installed automatically given time, but we can foce this to happen now from the terminal by typing:
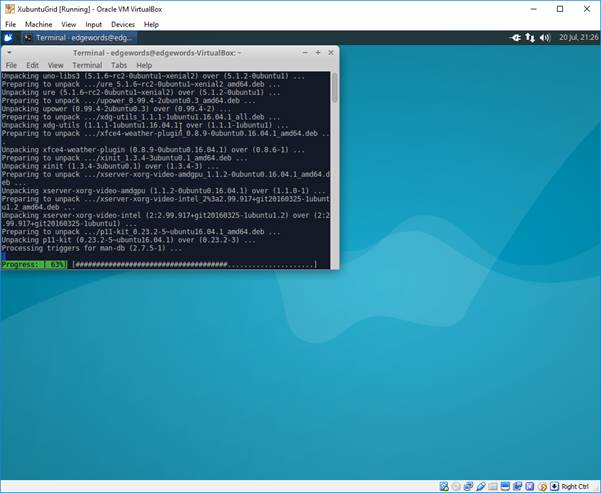
sudo apt update && sudo apt --yes full-upgrade
Breaking this down this means:
- sudo – Super User DO : Perform the next command as a privilaged (think Administrator/Root) user
- apt – a command line package manager for installing and updating software
- update – apt command line option to get the latest list of available software from the distro’s repositories
- && – once the previous commands have finished, perform the following next command
- apt –yes full-upgrade – Fully upgrade any installed software with newer versions from the repository, answering “yes” to any questions
- After entering this command you will be asked for your users password
- Checking Firefox after the update completes reveals it has been updated to the latest version
- Next we’ll install some new software:
- Chromium – the open source version of Google Chrome
- OpenJDK 8 JRE – A Java 8 Runtime environment. This is needed later to run the Selenium Grid Standalone Server jar. We could download and install Oracle’s Java 8 JRE from http://www.java.com/ , but using the distribution supplied Open JDK is less hassle and ensures we get security updates as part of the normal system update procedure.
- Enter the command:
sudo apt –yes install chromium-browser openjdk-8-jre

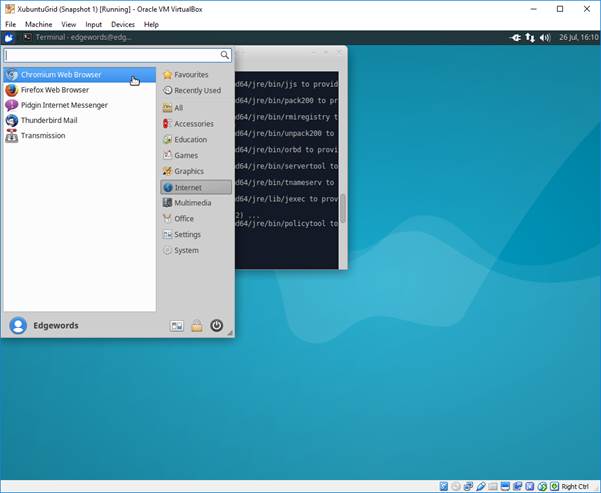
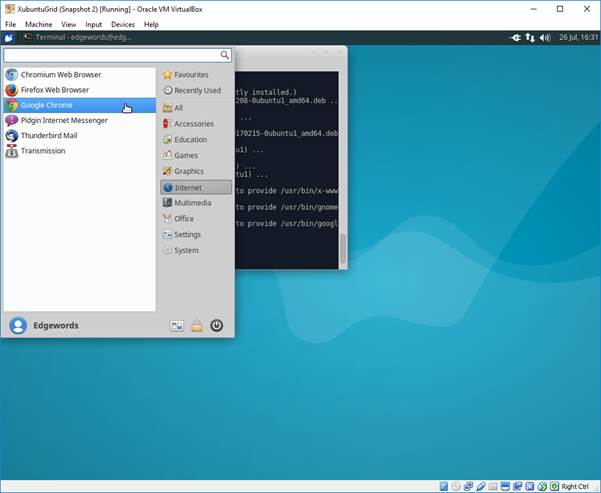
- After installation launch Chromium from the Internet section of the Application Launcher Menu
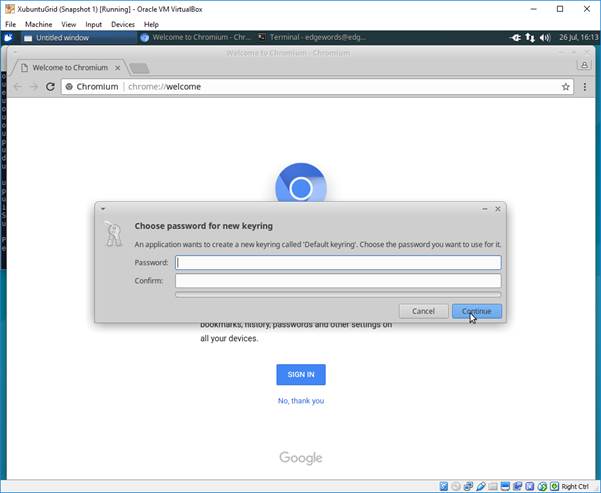
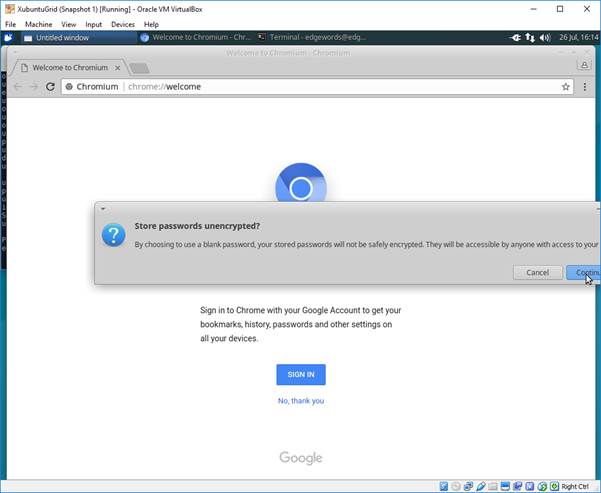
- You’ll be prompted to set up a key chain password. Just accept the default blank password. If different users use the same version of Chrome/Chromium, different keychains can be used to keep their saved web passwords secure and separate, this is not a concern for us.
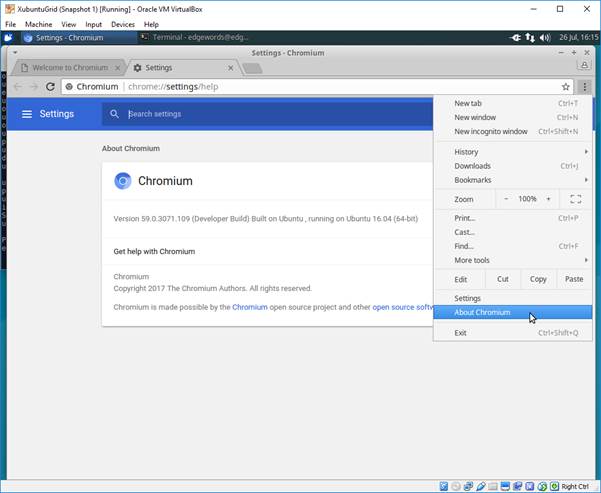
- The version of Chromium installed can be verified by clicking About Chromium.
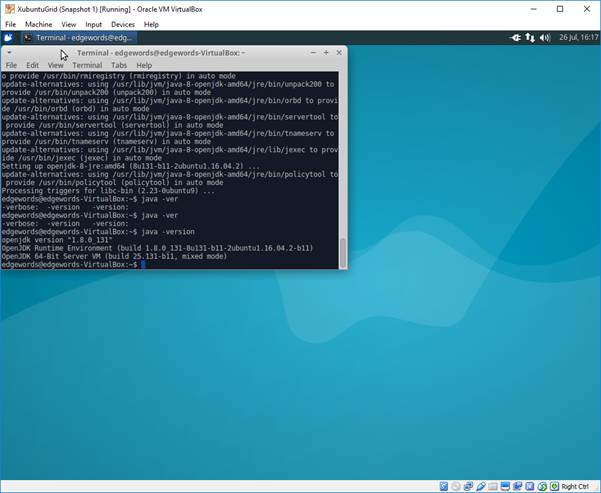
- The JRE version can be checked by entering the terminal command:
java -version
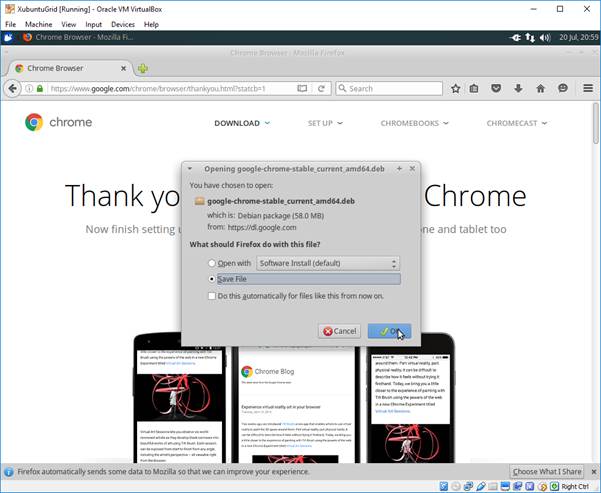
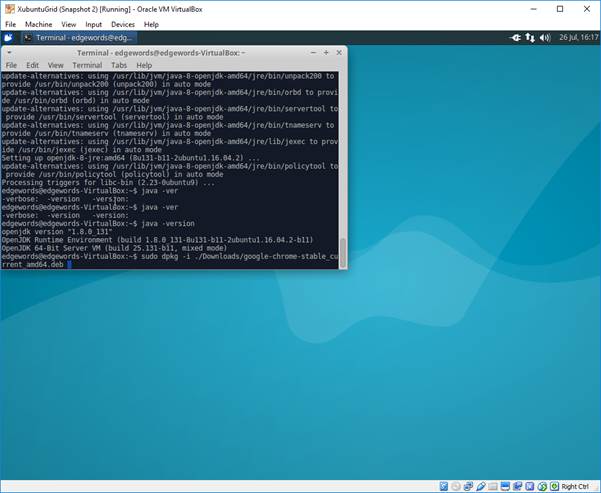
- To install Google Chrome we use the dpkg command line tool (apt fetches packages from the repositories for installation, dpkg can install individually downloaded .deb packages). Enter the command:
sudo dpkg -i ./Downloads/google-chrome-stable_current_amd64.deb
While typing in the path to the downloaded .deb file, try pressing the TAB key after a few characters. The terminal has powerful TAB auto completion built in.
- Worryingly an error is reported during the installation of the Google Chrome package. It needs some software that isn’t already installed. This is a potential complication of installing “foreign” packages on a repository based system.
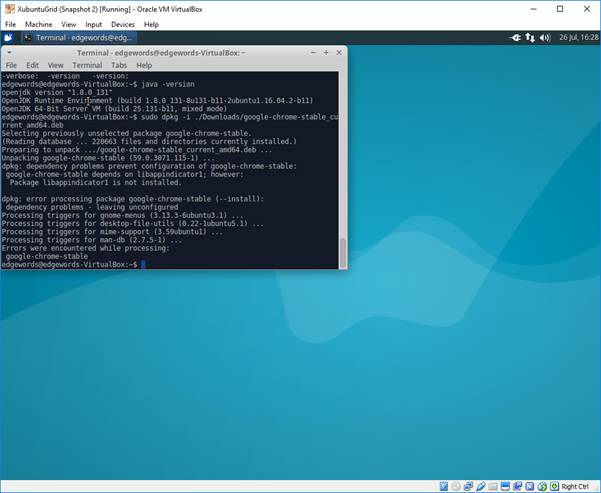
- Luckily the fix is quite easy. We ask apt to find and install any missing required packages from the repository with:sudo apt install -f –yes
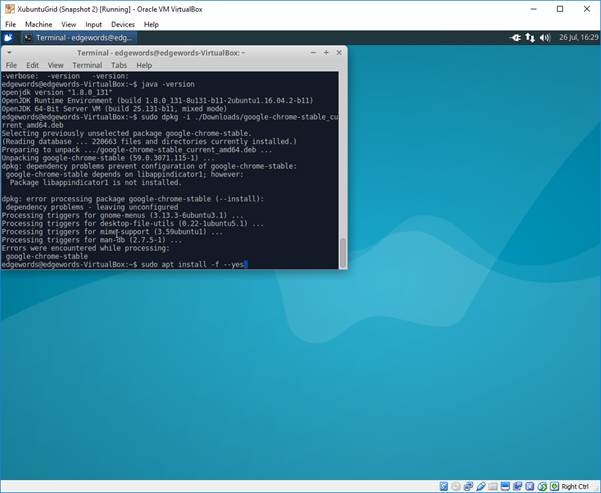
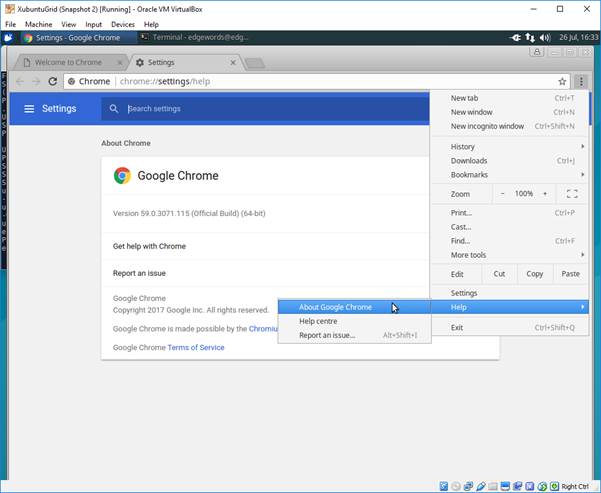
- Google Chrome can then be launched from the Internet section of the Application Launcher Menu.
- The installed version can then be checked
Part 7 – Configure the VMs Network
The VM will serve as a remote Selenium Grid Hub and Node, so it will be necessary to configure the VM so that it is accessible over the network.
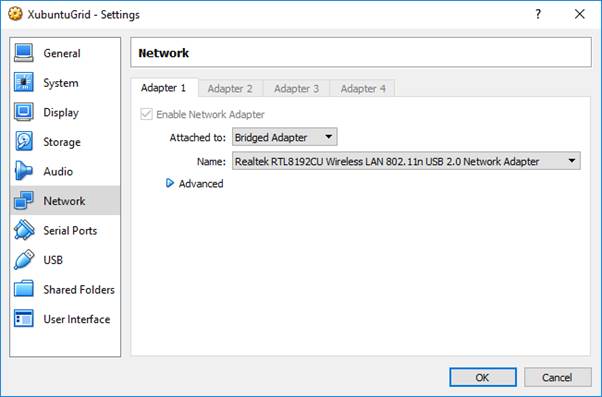
By default VirtualBox creates a VM with a network card in a NAT (Network Address Translation) configuration. This means the guest VM can access the internet via the host machines connection, but other computers on the same network as the host (including the host) cannot communicate with the VM. There are a few different approaches we might take to solve this, but one of the simplest is to put the VMs network adapter into a bridged network mode.
- Open the VMs Settings Dialog (right Ctrl key if you need to release the mouse pointer from the VM) and navigate to the Network page. Change the “Attached to:” drop down from NAT to Bridged and click OK. After a few seconds you may notice a network notification inside the VM.
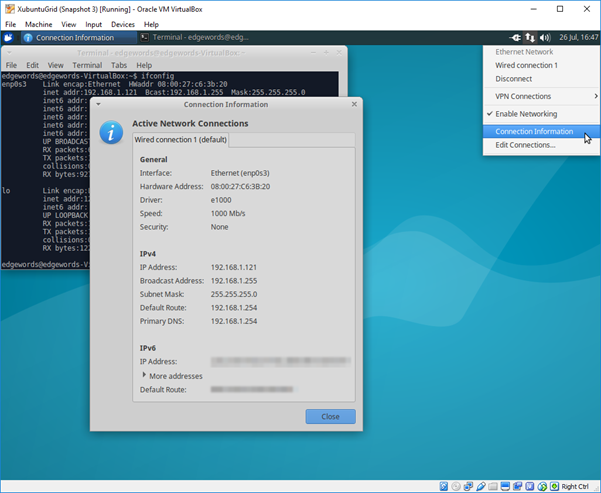
- You can check your VM’s new IP address by using the terminal command: ifconfig
- Or by selecting Connection Information from the Network Manager system tray icon.
Step 8 – Set Up Selenium Grid
- If you’ve followed the previous How to set up a Selenium Grid for Remote WebDriver Execution tutorial the next steps might start to feel eerily similar. We will need to:
- Download Selenium Standalone Server java executable
- Download appropriate Driver Servers and place them on our path
- Execute the Standalone Server in both Hub and Node configurations.
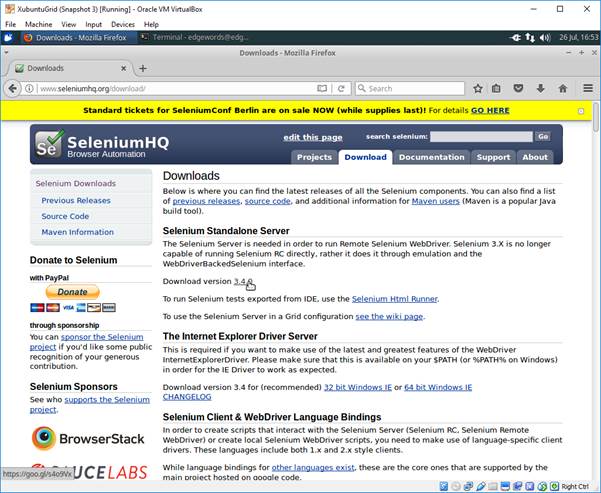
- The Standalone Server can be downloaded from http://www.seleniumhq.org/download
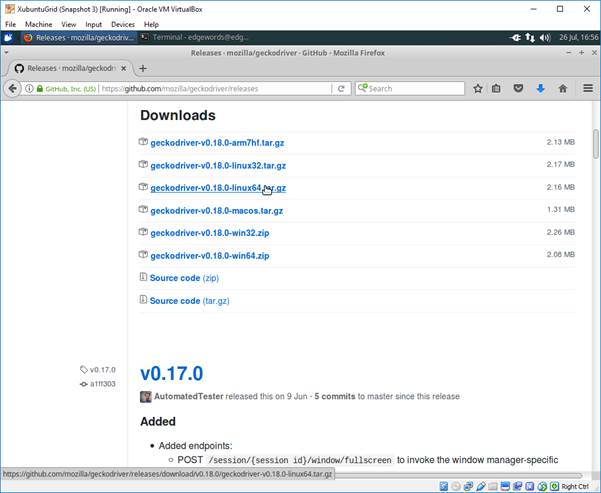
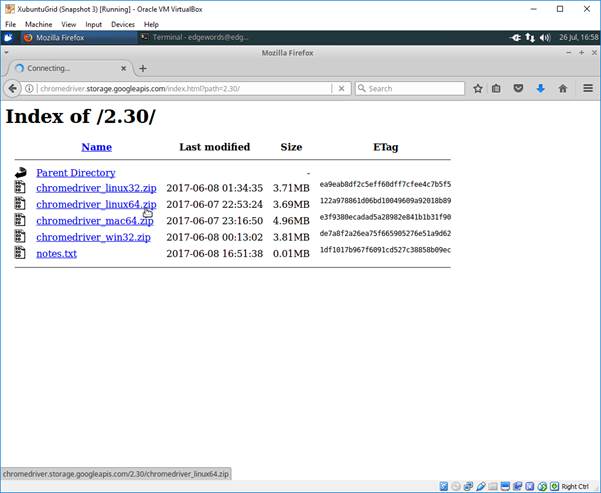
- While there, scroll down to the Third Party Drivers, Bindings, and Plugins section and download the latest ChromeDriver (For Google Chrome or Chromium)and GeckoDriver (for Firefox) driver servers.
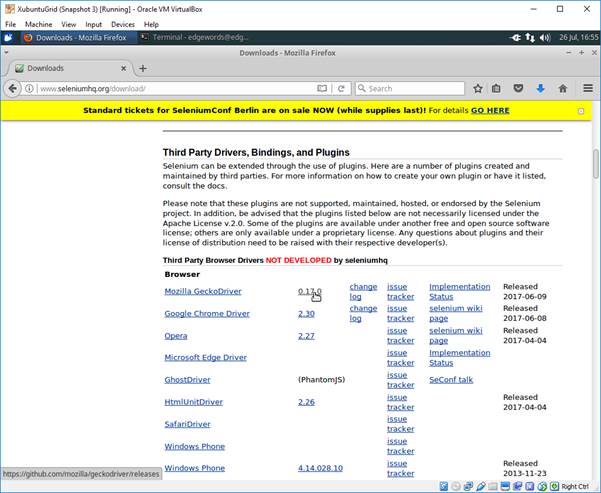
- Remember to get the correct “bit”edness for your VM.
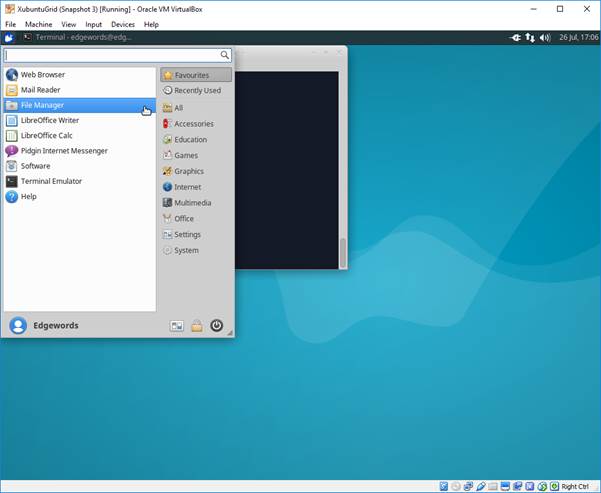
- Next open the File Manager from the application menu
- This will open your “Home” folder. In it’s default configuration, if your Home folder contains a “bin” folder that folder is added to your path. So we’ll create such a folder and extract the Driver Servers we just downloaded in to there.
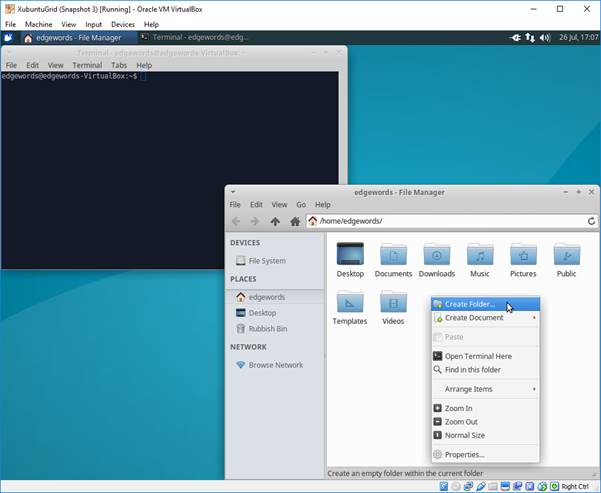
Right click in a bit of space to open the options menu
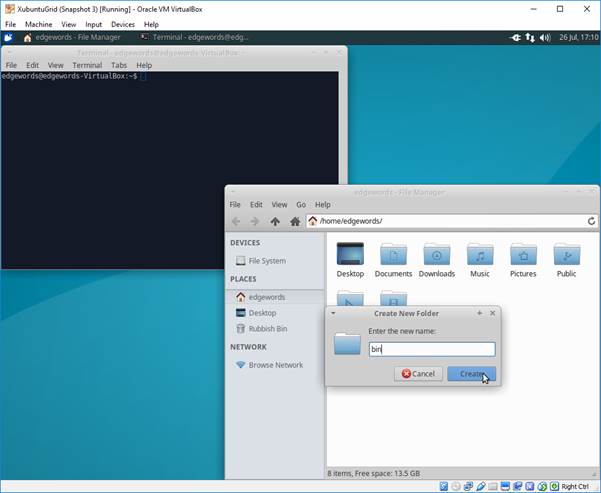
- The files you’ve downloaded will have been saved to the Downloads folder inside your home folder. Double clicking on the Chrome Driver or Gecko Driver archives will allow you to extract them in to your $HOME/bin folder.

- Once done, reboot the VM from the Application Launcher Menu.
Step 9 – Bringing up the Grid
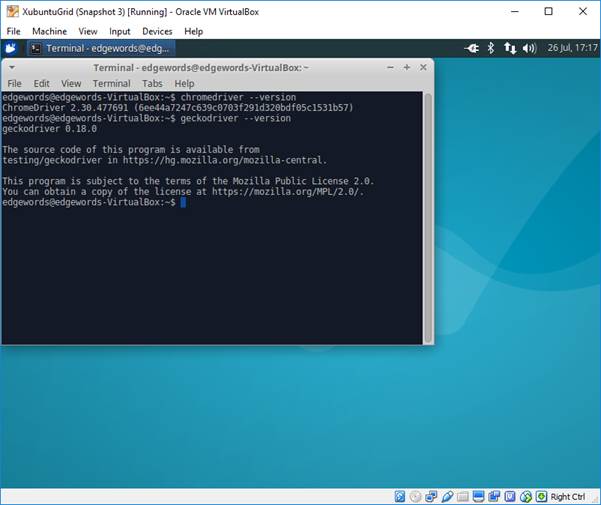
It’s time for a quick check that the Driver servers are on the path as required. Open a terminal and enter:
chromedriver --version
geckodriver --version
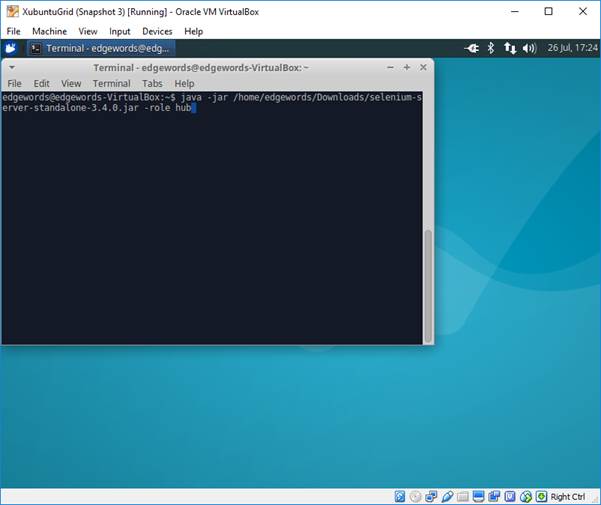
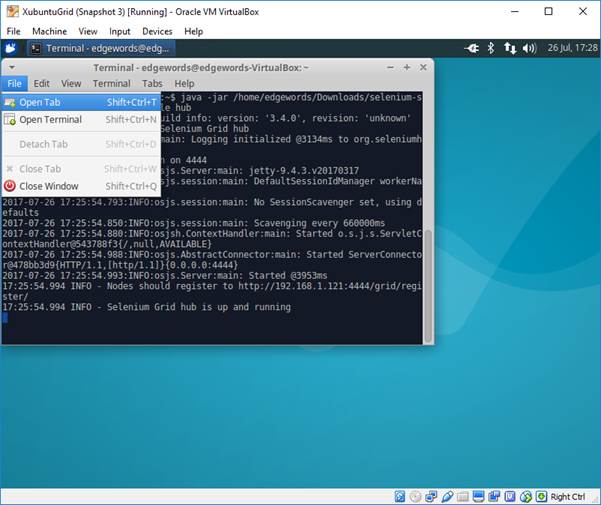
- Now execute the Standalone Sever in hub mode with:
java –jar /home/edgewords/Downloads/selenium-server-standalone-3.4.0.jar –role hub - Amending the username and file name as appropriate for you.
- Open a new Terminal tab
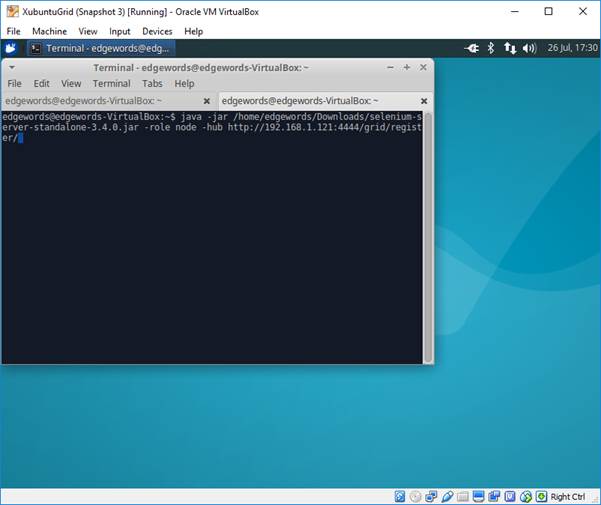
- Then start a new Standalone Server instance, but this time in a node configuration
java –jar /home/edgewords/Downloads/selenium-server-standalone-3.4.0.jar –role node hub http://<ip-addr-noted-earlier>:4444/grid/register/
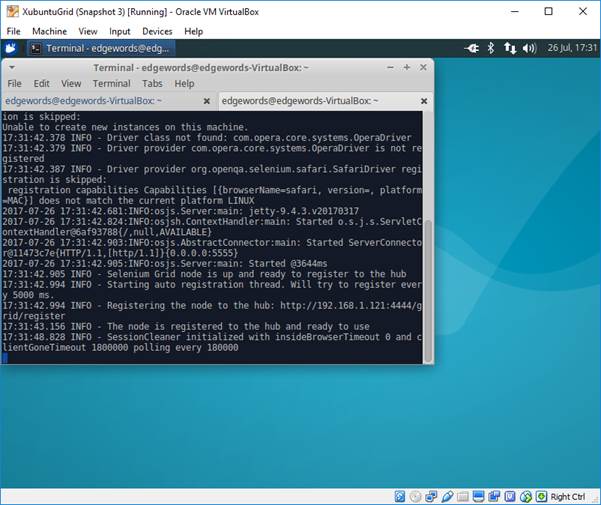
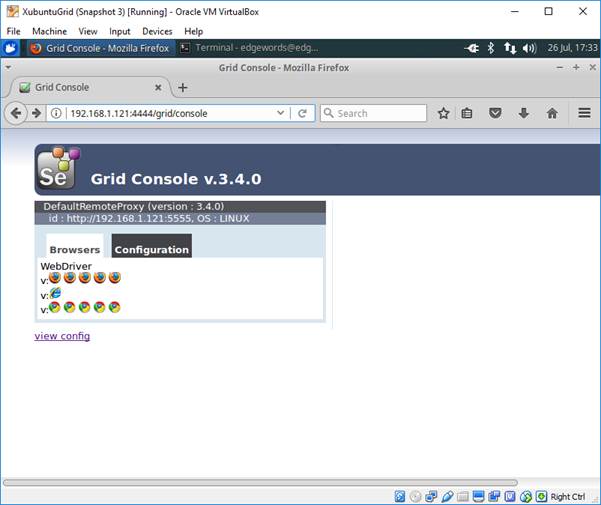
- Open a browser and verify the node has successfully registered with the hub
Step 10 – Use the Grid
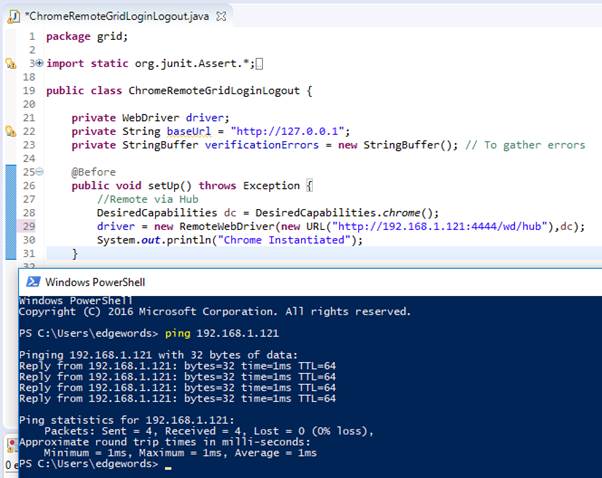
- All that remains is to switch back to our Host machine, ping the VM (to verify the network has successfully been set up), and write a WebDriver script
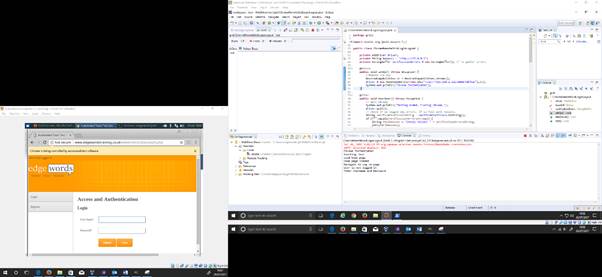
Script execution using two VMs in bridged networking mode
Step 11 – Next Steps
- Now you have a working Selenium Grid VM, shut it down and take a snapshot. If you continue to experiment with the VM but break something you can then always roll back to this known good working state. What might you (or we) want to try next? Here are a few ideas:
- Creating a small shell script to launch the Grid automatically when the VM starts
- Adding additional browsers (e.g. the “headless” PhantomJS browser)
- Going completely headless (freeing resources for test execution) – disabling the VMs display and running your browsers using Xvfb or the new built in headless modes available in new editions of Chrome and Firefox.
Setting up Selenium Grid part 1
For more information regarding Selenium WebDriver, please see our:
[…] Home/Selenium Grid/How to set up a Linux Virtual Machine for Selenium Grid – Part 1 Previous Next […]