This follows on from part 1 of our BDD with Ranorex 8 blog
So far, we have done all the required set up in Visual Studio, now let’s create our test framework!
Base Test Class
As all of our tests need to start and stop browsers and deal with the web page (DOM), lets just do this once in a base class which we can inherit into our tests.
Create a new Class in our helpers folder, call it BaseTest and add the following code.
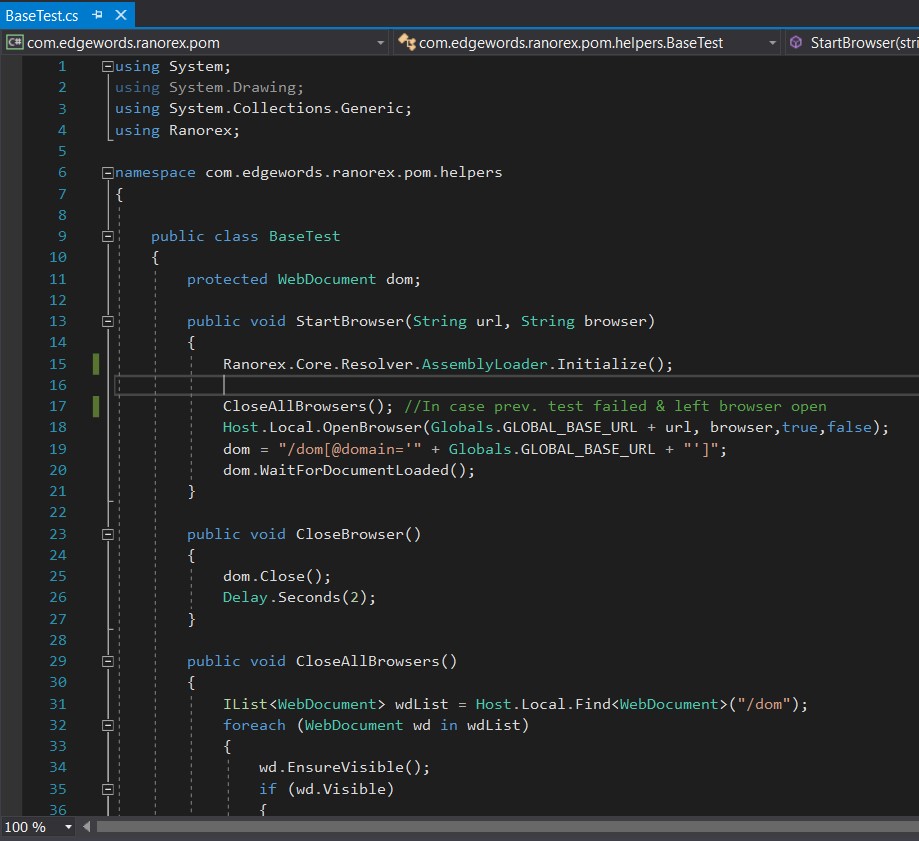
We have a field called dom which is of type Ranorex.WebDocument This allows us to store the DOM (the application folder in Ranorex repos) and pass it around our tests. The value of this (the base URL) comes from the App.config file we created earlier
Note: The Ranorex.Core.Resolver.AssemblyLoader.Initialize(); is required by newer versions of Ranorex in Visual Studio to load the appropriate dependencies for the Ranorex API.
We now have some useful Methods for starting and quitting the Web Browser that we can inherit into our test scripts.
Page Objects
Our Page Objects are simple, we have one for each Web Page in our application, and they simply create fields that store how to identify the corresponding Web Element.
To do this we use the C# Lambda expression ‘=>’
The reason for this is that if we just set the RanoreXPath directly, e.g.
public WebElement Home = dom.FindSingle(“.//span[@innertext=’Home’]”, Globals.GLOBAL_TIMEOUT);
Then when we instantiate our Page Object Class, Ranorex would try to find the Web Elements at that time, and if we have a dynamic web page some of the elements may not yet be displayed and Ranorex would throw an error.
So using the Lambda expression, e.g.
public WebElement Home => dom.FindSingle(“.//span[@innertext=’Home’]”, Globals.GLOBAL_TIMEOUT);
Ranorex only searches for the Web Element when we access the field from our Test Class.
Home Page Page Object Class example:

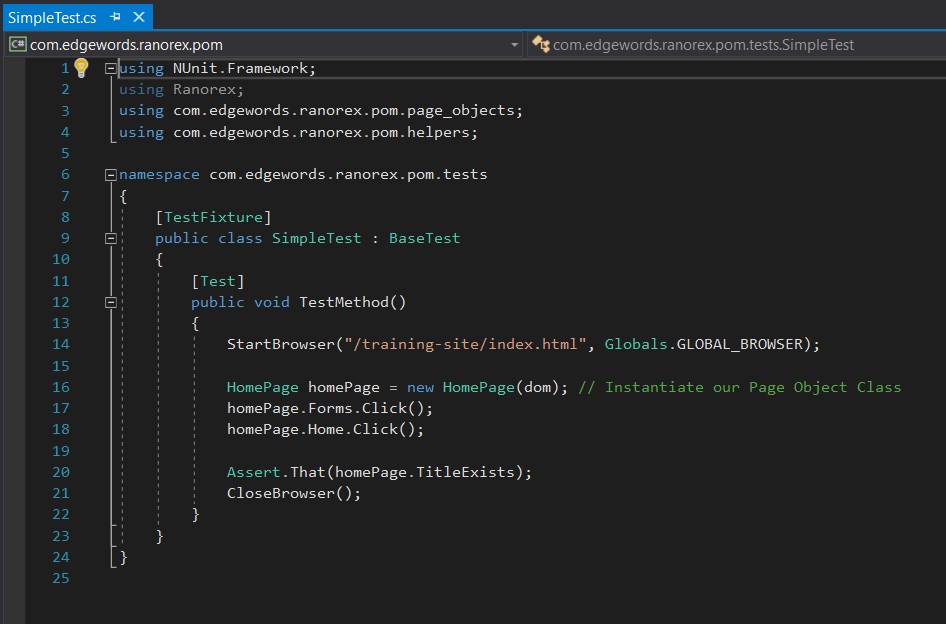
Simple Test Class
Here is an example of a really simple Test just for the Home Page, and to run so we can check we have everything in place before introducing SpecFlow BDD
So now we can check this works by opening our Test Explorer (Test->Windows->Test Explorer) choose run all… and check the results!
If everything is OK, we can move onto part 3 which then moves to using SpecFlow
[…] Home/BDD, Ranorex, SpecFlow/BDD using Ranorex, NUnit, POM in Visual Studio 2017 part 1 Previous Next […]
[…] Home/BDD, Ranorex, SpecFlow/BDD using Ranorex, NUnit, POM in Visual Studio 2017 part 3 Previous […]